 Save Pin
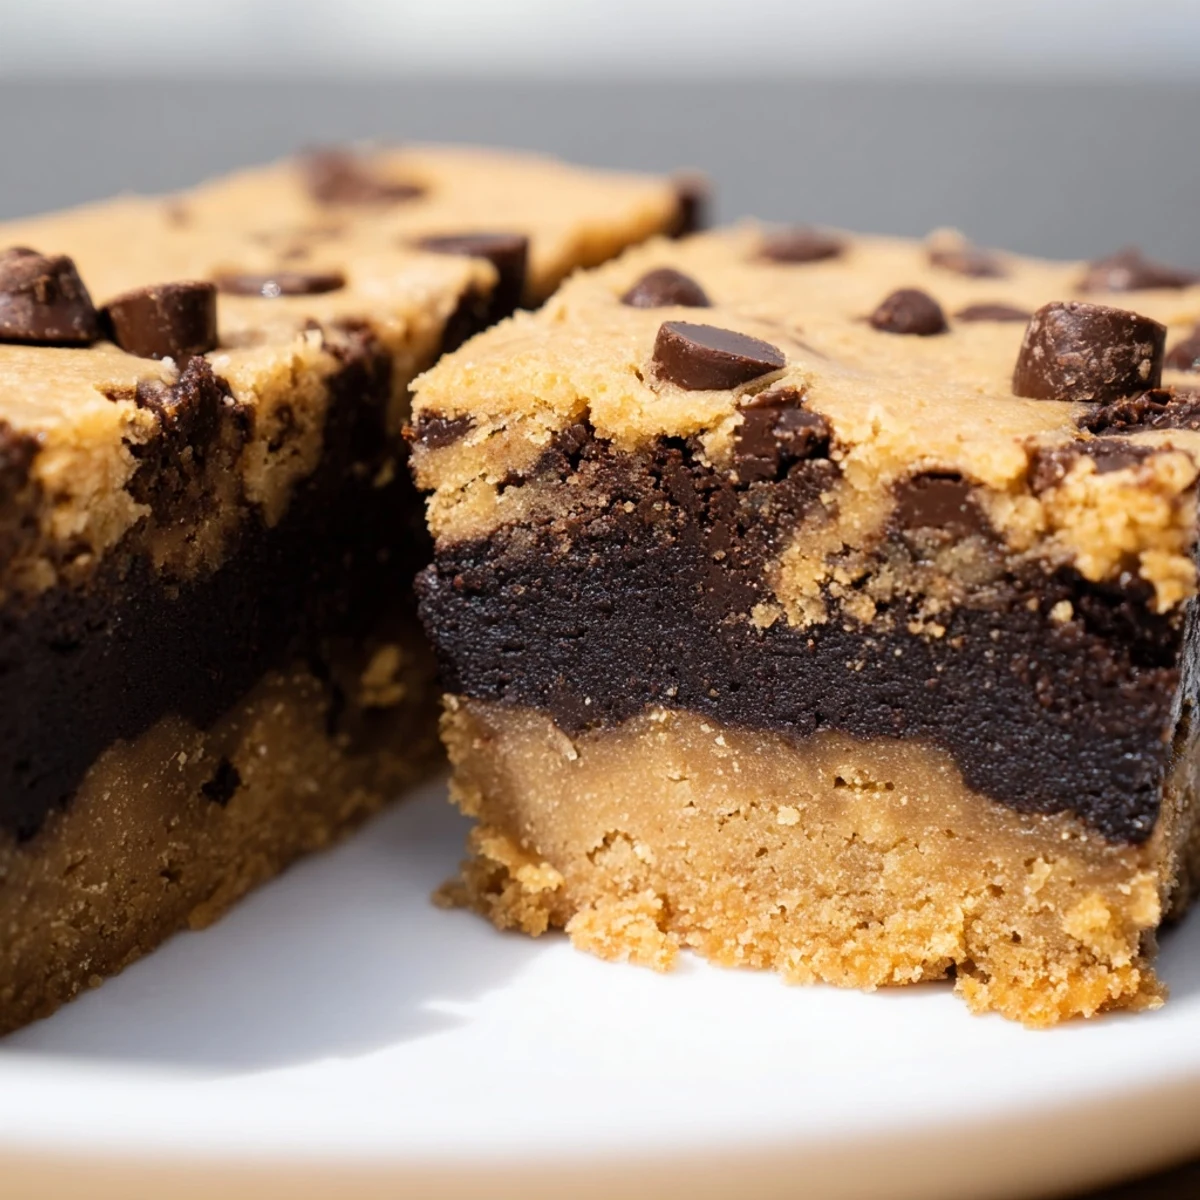
 These irresistible bars bring together the best of both worlds: a dense, fudgy brownie foundation topped with layers of classic chocolate chip cookie dough. The result is a decadent two-texture treat that satisfies every chocolate craving. Each bite delivers the intense cocoa depth of brownies alongside the buttery sweetness of freshly baked cookies.
The magic happens during baking, where the brownie layer becomes incredibly moist while the cookie topping bakes to golden perfection with melty chocolate pockets throughout. Serve them warm with a scoop of vanilla ice cream for an elevated dessert experience, or enjoy them at room temperature for a satisfying afternoon treat with coffee or milk.
My roommate walked in while I was literally spreading brownie batter into a pan, already halfway through making cookie dough on the other counter. She just stared at me and asked if I was having some kind of kitchen breakdown. Nope, just trying to solve the eternal dessert dilemma by smashing two favorites into one pan.
First time I made these for a potluck, I cut them too soon while they were still slightly warm. Big mistake because they fell apart but everyone still fought over the messy pieces with their forks. Learned my lesson about patience but also learned that people will absolutely demolish these regardless of presentation.
Ingredients
- 115 g unsalted butter, melted: The foundation of that dense fudgy brownie layer we all crave
- 150 g granulated sugar: Creates that crackly top on brownies while keeping them tender
- 75 g light brown sugar: Adds moisture and subtle caramel depth to the chocolate base
- 2 large eggs: Essential for structure and creating that signature brownie texture
- 1 tsp vanilla extract: Dont skimp here because vanilla amplifies chocolate flavor
- 65 g unsweetened cocoa powder: Use good quality cocoa because it makes all the difference
- 65 g all-purpose flour: Just enough to hold things together without making the brownies cakey
- 1/4 tsp salt: Crucial for balancing all that sugar and intensifying chocolate
- 115 g unsalted butter, softened: Room temperature butter is non negotiable for fluffy cookie dough
- 100 g light brown sugar: Gives the cookie layer that irresistible chew and butterscotch notes
- 50 g granulated sugar: Helps create crisp edges on the cookie topping
- 1 large egg: Binds the cookie dough and adds richness
- 1 tsp vanilla extract: Another hit of vanilla because cookie dough needs it too
- 150 g all-purpose flour: The backbone of classic chocolate chip cookie texture
- 1/2 tsp baking soda: Gives the cookie layer its rise and spread
- 1/4 tsp salt: Brings out all the flavors in the cookie layer
- 120 g semisweet chocolate chips: Use whatever chocolate makes you happiest because its your dessert
Instructions
- Preheat your oven and prepare the pan:
- Crank that oven to 175°C and line a 23 cm square pan with parchment paper. Trust me about leaving that overhang because lifting out a solid block of baked goodness is way easier than trying to pry it out later.
- Make the brownie batter:
- Whisk melted butter with both sugars until combined then beat in eggs and vanilla until smooth. Sift in cocoa, flour, and salt, folding gently until just combined.
- Spread the brownie layer:
- Get that dark chocolate fudge into the bottom of your pan as evenly as possible. Do not worry if it looks thin because the cookie dough will add serious height.
- Cream up the cookie dough:
- Beat softened butter with both sugars until fluffy then add egg and vanilla. Whisk flour, baking soda, and salt in a separate bowl before gradually mixing it into the wet ingredients.
- Add the chips and assemble:
- Fold those chocolate chips into the dough then drop spoonfuls over the brownie layer. Gently spread it around and do not stress if some brownie shows through because that looks gorgeous anyway.
- Bake to perfection:
- Slide that pan into the oven for 33 to 36 minutes until golden on top. A toothpick should come out with some moist crumbs because you definitely want these on the fudgy side.
- Patience is everything:
- Let these cool completely in the pan on a wire rack. I know the smell is torture but cutting too soon makes a mess you will regret.
 Save Pin
 My grandmother took one bite and immediately declared these dangerous. She then proceeded to eat two bars while asking exactly how much butter was in them, which I interpreted as full approval despite the slight judgment in her voice.
Making Them Your Way
Swap semisweet chips for dark chocolate chunks or throw in chopped walnuts if you need some crunch. I have made these with milk chocolate chips when my kids were begging and while they are sweeter, nobody complained.
Storage Secrets
These actually taste better the next day when all the flavors have had time to mingle. Store them in an airtight container at room temperature for up to four days, assuming they last that long.
Serving Ideas
Warm these slightly in the microwave for about 15 seconds before serving. They are incredible on their own but vanilla ice cream on top turns them into a restaurant quality dessert.
- Try topping with flaky sea salt right after baking for a gourmet touch
- A scoop of coffee ice cream creates the most amazing mocha situation
- Draping warm caramel over the top is basically cheating but worth every calorie
 Save Pin
 Every time I bring these somewhere, at least three people ask for the recipe. Consider yourself warned about making new friends unintentionally.
Recipe FAQs
- → How do I know when the bars are done baking?
-
Insert a toothpick into the center—it should come out with a few moist crumbs rather than completely clean. The top should appear golden and set, while the edges may have started to pull away slightly from the pan sides. This ensures a gooey texture without underbaking.
- → Can I make these ahead of time?
-
Absolutely. These bars actually taste better the next day as the flavors meld together. Store them in an airtight container at room temperature for up to 3 days, or refrigerate for up to a week. For longer storage, wrap individually and freeze for up to 3 months.
- → What type of chocolate chips work best?
-
Semisweet chocolate chips provide a balanced sweetness that complements both layers. However, feel free to experiment with dark chocolate chips for intensity, milk chocolate for a sweeter profile, or even chopped chocolate bars for larger melty pockets. Adding chopped nuts like walnuts or pecans creates delightful texture contrast.
- → Why did my brownie layer turn out cakey instead of fudgy?
-
Overmixing the brownie batter incorporates too much air, creating a cakey texture. Gently fold the dry ingredients until just combined—some small lumps are perfectly fine. Additionally, avoid overbaking; remove from the oven as soon as a toothpick shows moist crumbs for that desired fudgy consistency.
- → Can I use a different size pan?
-
A 9-inch square pan is ideal for the proper thickness and baking time. Using an 8x8-inch pan will yield thicker bars requiring extended baking, while a 9x13-inch pan creates thinner bars that may bake faster. Adjust baking time accordingly and check for doneness 5-7 minutes before the suggested time.
- → How should I cut these bars for clean slices?
-
Allow the bars to cool completely in the pan before slicing—this prevents crumbling. Use a sharp knife wiped clean between cuts, or try a plastic knife which cuts through sticky layers more smoothly. For perfect portions, chill the cooled bars for 30 minutes before cutting into squares.
