 Save Pin
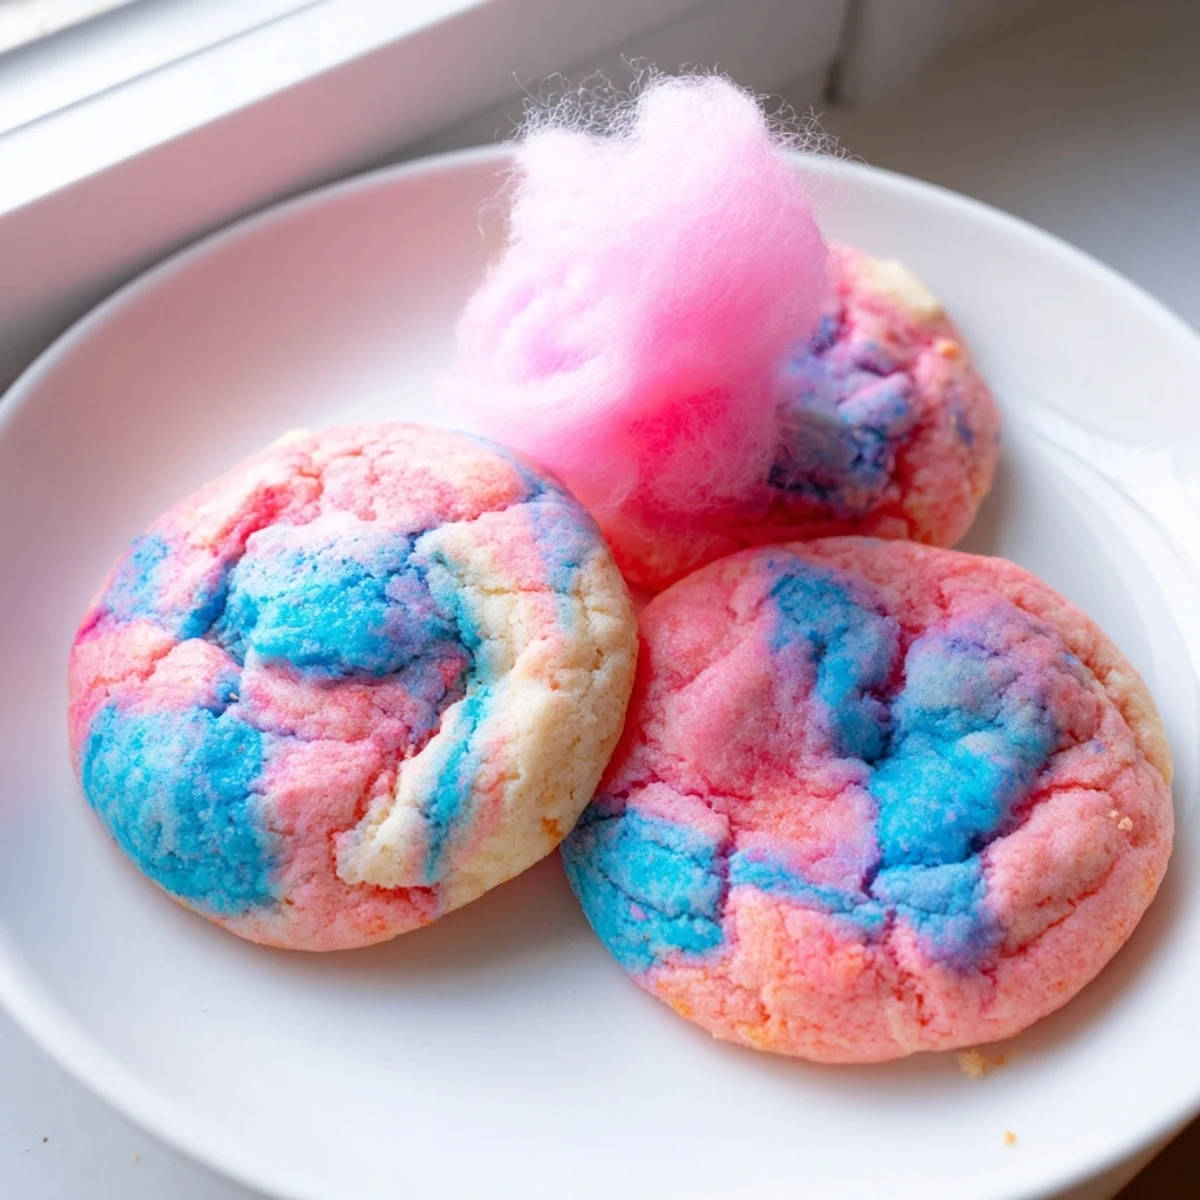
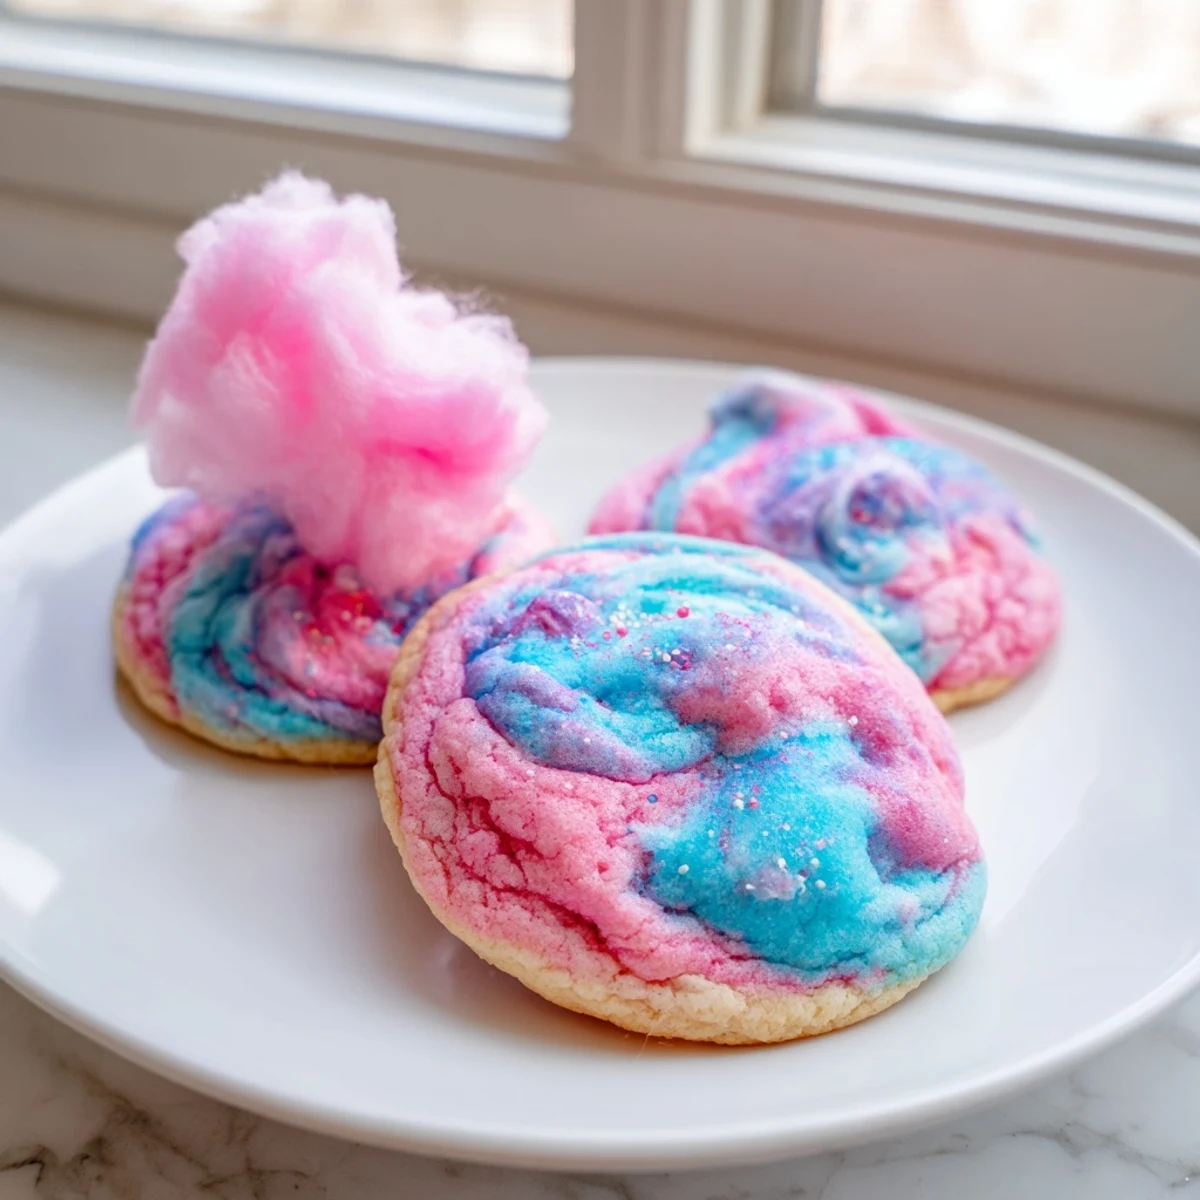
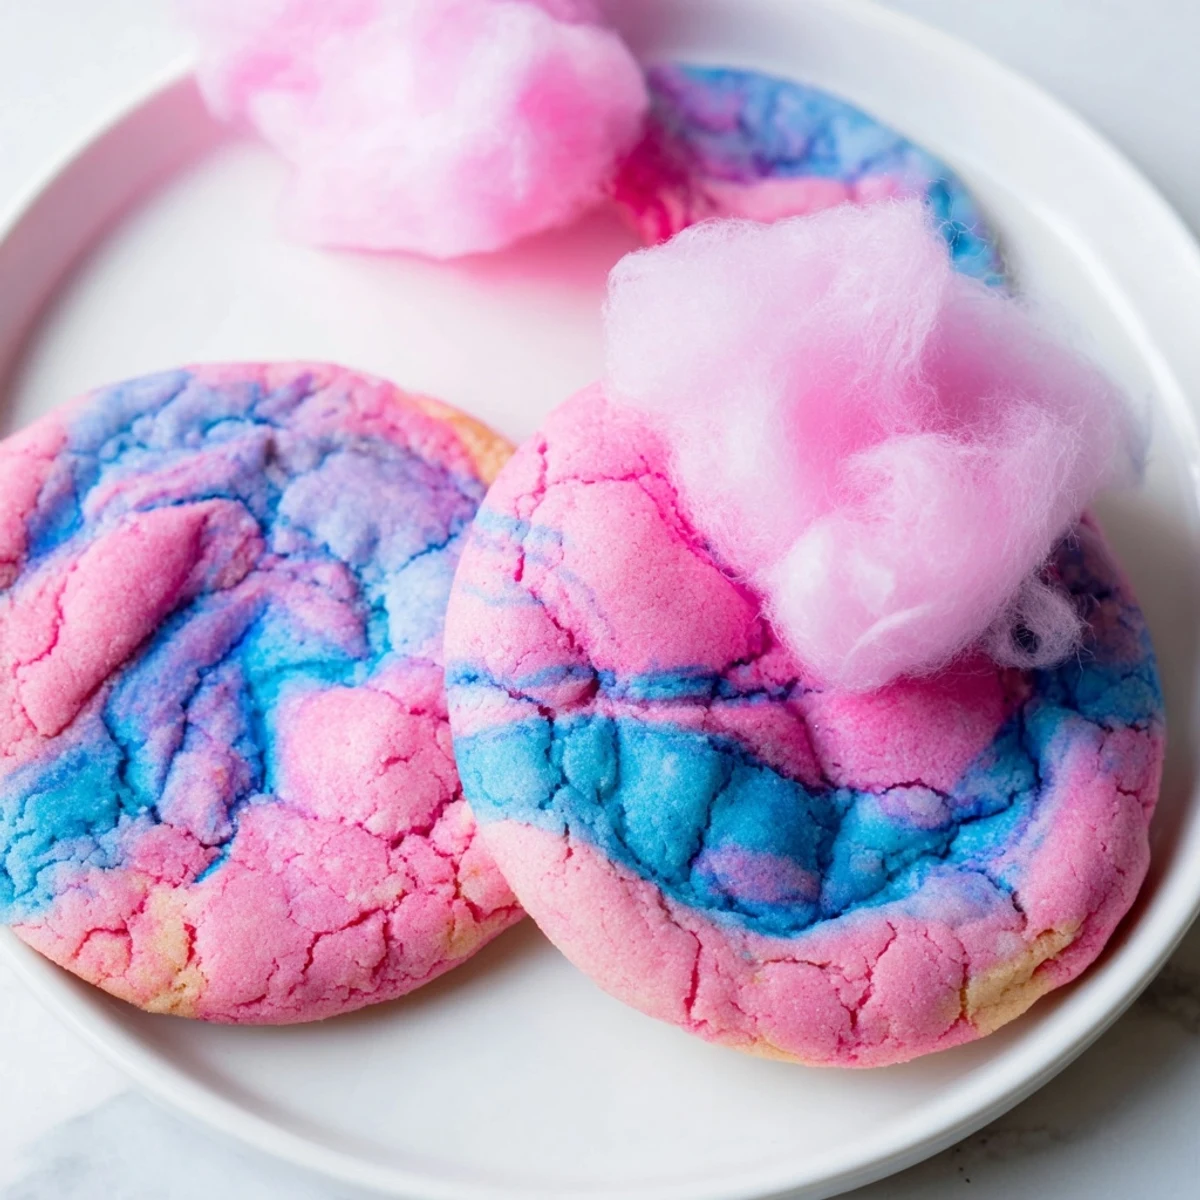
 These cotton candy cookies are soft, chewey, and bursting with whimsical pastel charm. Half the dough is tinted pink and the other half blue, then gently swirled together to create a beautiful marbled effect that looks stunning on any dessert table.
Infused with cotton candy flavoring and topped with an optional tuft of real cotton candy, they're a hit at birthday parties, bake sales, and themed events. Ready in just 30 minutes with simple pantry ingredients.
The summer my niece turned six, she asked for a carnival themed birthday party, and I panicked because I cannot make cotton candy to save my life. What I can do, however, is bake, so I turned that fluffy spun sugar daydream into a cookie instead. The look on her face when she saw those pastel swirled rounds coming out of the oven was worth every minute of experimentation. These cotton candy cookies have been my secret weapon for whimsical celebrations ever since.
I brought a batch to a neighborhood potluck once and a normally stoic neighbor actually gasped when she bit into one. She cornered me by the dessert table for ten minutes demanding the secret, and I had to confess it was just a half teaspoon of flavoring doing all the heavy lifting.
Ingredients
- All purpose flour (2 1/2 cups, 315 g): This is the backbone of your dough, and spooning it into the cup rather than scooping directly keeps the cookies tender rather than cakey.
- Baking powder (1 tsp): Gives the cookies a gentle lift so they stay soft and pillowy rather than spreading flat.
- Baking soda (1/2 tsp): Works alongside the baking powder for just enough rise without making them puffy.
- Salt (1/2 tsp): A small amount that makes the sweetness sing and keeps the flavor from tasting one dimensional.
- Unsalted butter, softened (3/4 cup, 170 g): Room temperature butter creams properly with sugar, trapping air for that soft bite everyone loves.
- Granulated sugar (1 cup, 200 g): Delivers sweetness and helps those edges get ever so slightly crisp while the center stays soft.
- Light brown sugar, packed (1/2 cup, 100 g): Adds a hint of molasses depth that balances the cotton candy flavor beautifully.
- Large eggs (2): Bind everything together and contribute to the chewy texture.
- Pure vanilla extract (2 tsp): Rounds out the flavor base and makes the cotton candy note feel warm rather than artificial.
- Cotton candy flavoring (1/2 tsp): The star player here, and a little goes a long way so do not be tempted to add extra.
- Pink and blue gel food coloring: Gel is non negotiable because liquid coloring will thin your dough and muddy the swirl.
- Cotton candy for garnish (1/2 cup, 60 g, optional): A whimsical finishing touch that melts fast, so add it only right before serving.
Instructions
- Preheat and prepare your pans:
- Set your oven to 350°F (175°C) and line two baking sheets with parchment paper so nothing sticks and cleanup is effortless.
- Whisk the dry ingredients:
- In a medium bowl, whisk together the flour, baking powder, baking soda, and salt until evenly combined, then set it aside.
- Cream the butter and sugars:
- Beat the softened butter, granulated sugar, and brown sugar in a large bowl until the mixture looks pale, light, and cloudlike, about two to three minutes.
- Add the wet ingredients:
- Drop in the eggs one at a time, then pour in the vanilla extract and cotton candy flavoring, beating until everything is silky smooth.
- Bring the dough together:
- Gradually add the dry ingredients to the wet mixture on low speed, mixing just until a soft dough forms and you no longer see streaks of flour.
- Color and swirl the dough:
- Split the dough evenly into two bowls, tint one half pink and the other blue using gel coloring, then knead each until the color is uniform throughout.
- Shape into marbled balls:
- Pinch a small piece from each colored dough, gently roll them together between your palms into a 1.5 inch ball with a swirled marble look, and place them on the sheets two inches apart.
- Bake until just set:
- Slide the trays into the oven for 9 to 11 minutes, pulling them out when the edges are barely golden but the centers still look soft and slightly underdone.
- Cool completely:
- Let the cookies rest on the baking sheet for five minutes so they firm up gently, then transfer them to a wire rack to cool the rest of the way.
- Add the cotton candy garnish:
- If using, gently press a small tuft of cotton candy onto each cookie right before serving for a magical finishing touch that will make everyone smile.
 Save Pin
 There is something quietly powerful about a cookie that makes grown adults behave like children at a county fair.
Storing Your Cookies
Keep baked cookies in an airtight container at room temperature and they stay soft and lovely for up to five days. If you stacked them with cotton candy on top the whole batch would turn into a sticky situation overnight, so always garnish only what you plan to serve immediately.
Making These Your Own
Swap the pink and blue for any pastel pair that fits your occasion, lavender and mint green look stunning for spring gatherings. Clear vanilla extract instead of the amber kind keeps the dough brighter so your colors really pop without that yellowish undertone.
Tools That Make This Easier
An electric mixer saves your arm from the creaming step and gets the butter fluffier than hand mixing ever could. Beyond that, a simple set of measuring cups, two baking sheets, parchment paper, and a wire rack are genuinely all you need to pull this off beautifully.
- Use a cookie scoop if you want uniform balls so they all bake at the same rate.
- Gloves save your hands from looking like a cotton candy explosion while kneading the color in.
- Trust the slightly underdone center and resist the urge to overbake because they set up as they cool.
 Save Pin
 Every time I make these, someone asks for the recipe, and I always tell them the same thing: the magic is in the swirl. Bake a batch, share them freely, and watch a little carnival joy appear in your own kitchen.
Recipe FAQs
- → Can I make cotton candy cookies without cotton candy flavoring?
-
Yes, you can substitute with a combination of vanilla extract and a touch of strawberry or raspberry extract for a similar sweet, fruity profile. The cookies will still look beautiful with the pastel swirls even without the specific flavoring.
- → Why did my colors turn muddy when swirling the dough?
-
Muddy colors usually happen from overmixing. Gently roll the two colored dough portions in your hands just enough to create a marble pattern. Avoid kneading or blending them too thoroughly together.
- → How should I store these cookies to keep them soft?
-
Store cooled cookies in an airtight container at room temperature for up to 5 days. Add the cotton candy garnish only right before serving, as it dissolves quickly when exposed to moisture in the air.
- → Can I freeze the cookie dough for later use?
-
Absolutely. Form the swirled dough balls and freeze them on a baking sheet until solid, then transfer to a freezer bag for up to 3 months. Bake from frozen, adding 1-2 extra minutes to the baking time.
- → Why do my cookies spread too much while baking?
-
Over-spreading is often caused by dough that is too warm or butter that was too soft. Chill the shaped dough balls in the refrigerator for 20-30 minutes before baking to help them hold their shape and thickness.
- → What gel food coloring brands work best for vibrant pastel shades?
-
Wilton, AmeriColor, and Chefmaster gel colorings produce bright, vibrant hues without adding excess liquid to the dough. Start with just a drop or two, as gel colors are highly concentrated and intensify as you mix.
