 Save Pin
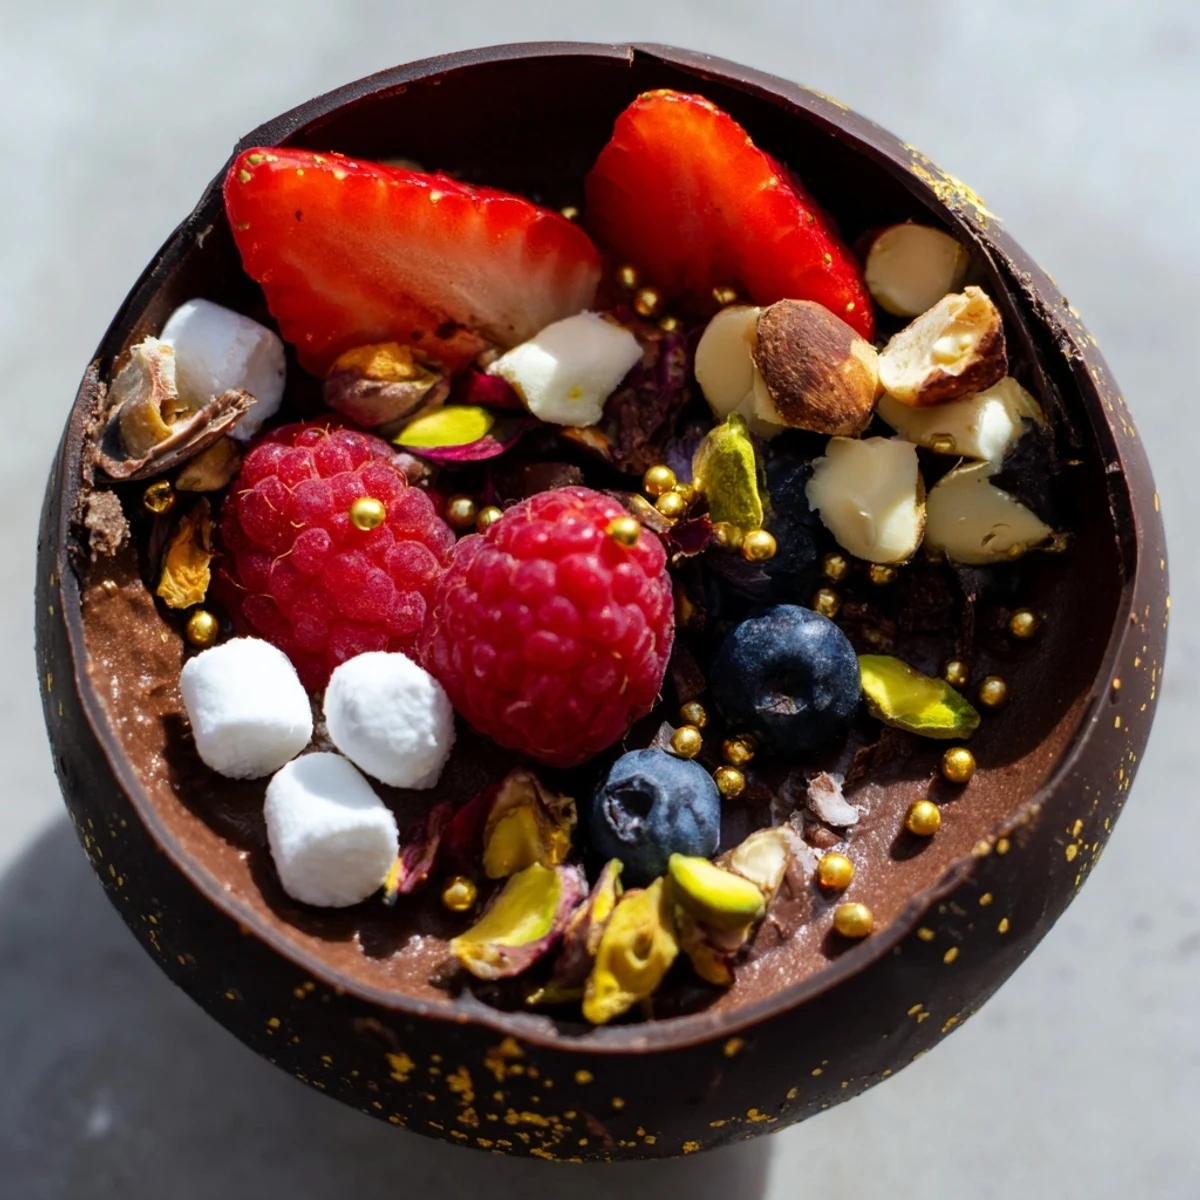
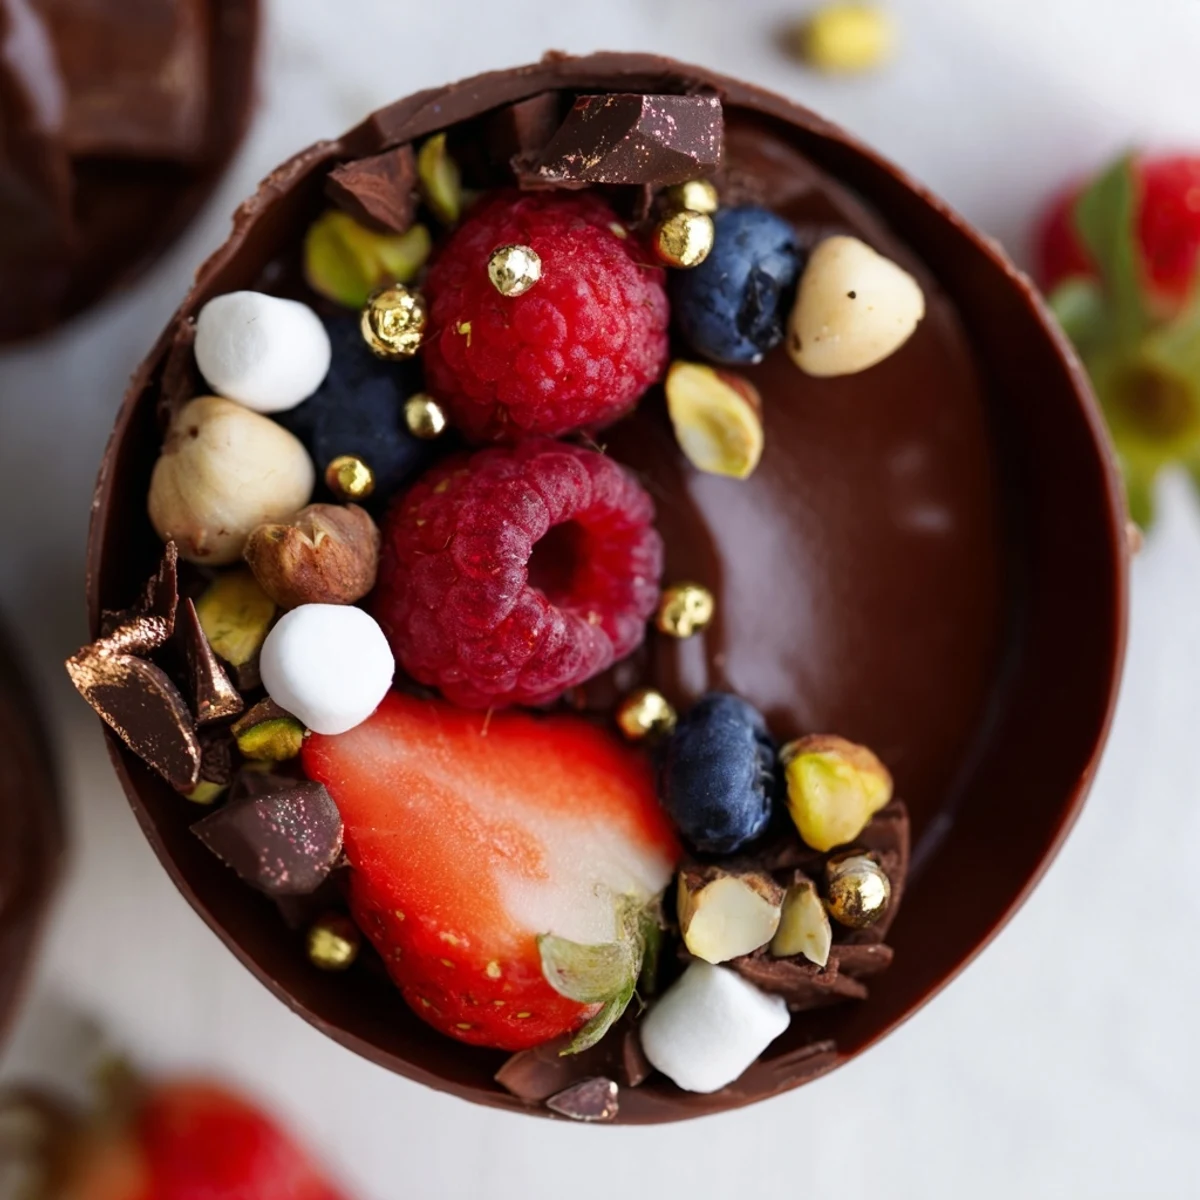
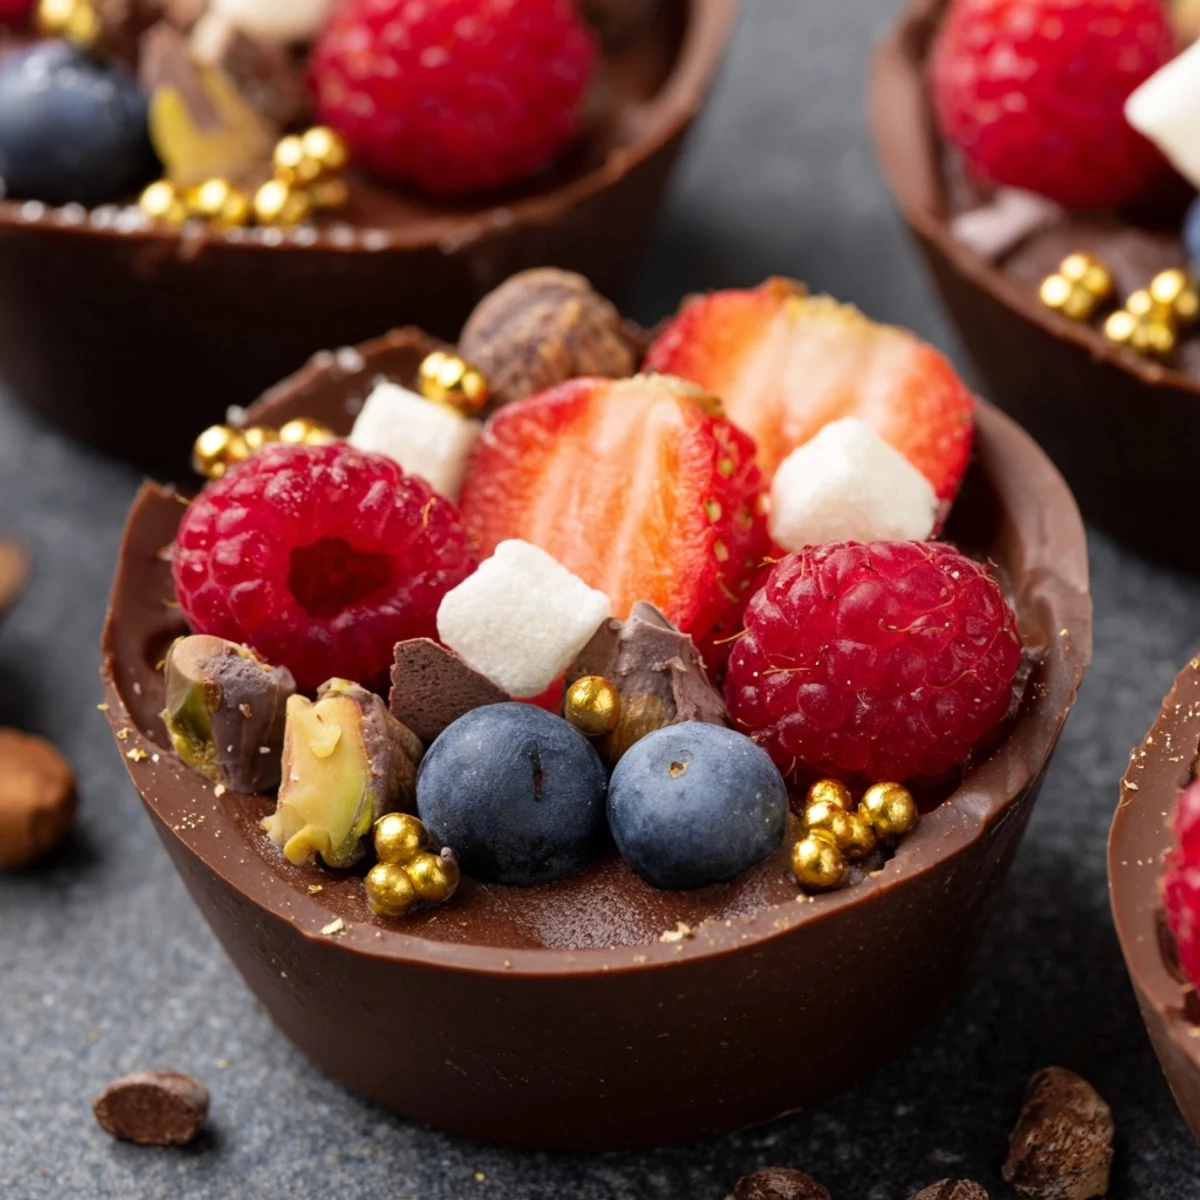
 These decadent chocolate grazing cups feature delicate handmade dark chocolate shells filled with silky chocolate mousse. Each cup is topped with fresh mixed berries, chopped nuts, mini marshmallows, and chocolate curls for luxurious presentation. Perfect for dessert tables, special occasions, or whenever you crave an elegant sweet treat. The combination of rich dark chocolate, airy mousse, and fresh fruit creates an indulgent dessert experience that's both visually stunning and delicious.
The first time I made chocolate cups, I accidentally used chocolate that wasn't quite tempered properly, and they started melting in my hands before I could even fill them. My kitchen was warm, my patience was thin, but those imperfect little cups still disappeared in seconds at the dinner party. That's when I learned that people will forgive almost anything when chocolate's involved, especially when it's this rich and ridiculously elegant.
Last New Year's Eve, I set up a whole grazing table with these cups as the centerpiece. Watching guests lean over the platter, choosing their toppings, mixing berries with marshmallows, it became this interactive moment instead of just dessert being served. My friend Sarah, who claims she doesn't even like sweets that much, went back for thirds and demanded the recipe before midnight struck.
Ingredients
- Dark chocolate: I use 60-70% cocoa because it creates cups that actually hold their shape without being too bitter
- Heavy cream: The higher the fat content the better your mousse will hold its structure when piped
- Powdered sugar: This dissolves into the cream better than granulated sugar and gives a smoother texture
- Vanilla extract: Don't skip this even with all the chocolate, it rounds out the richness beautifully
- Fresh berries: Choose ones that aren't too ripe or they'll weep into your mousse and make it soggy
- Chopped nuts: Toast them for 3 minutes first and the flavor difference is incredible
- Mini marshmallows: These add this fun nostalgic element that somehow works with something so fancy
Instructions
- Melt the chocolate for your cups:
- Break your chocolate into pieces and melt it in 30 second bursts, stirring between each one. You want it completely smooth and glossy, not grainy at all, or your cups won't set properly.
- Coat your cupcake liners:
- Use a pastry brush to paint the chocolate up the sides of each liner, making it slightly thicker at the bottom. The first layer always looks patchy and that's completely normal.
- Chill until firm:
- Pop these in the fridge for at least 20 minutes, but don't rush this part. The chocolate needs to be completely solid before you try removing the liners or they'll crack.
- Carefully peel off the liners:
- Work slowly and gently, starting from the top edge. If a cup breaks, just eat the evidence and nobody needs to know.
- Whip your cream:
- Use a cold bowl and beaters, whipping until soft peaks just barely hold their shape. Over whip and you'll end up with butter instead of mousse.
- Melt the mousse chocolate:
- Let this cool slightly after melting so it doesn't seize when it hits the cream. Warm chocolate equals sad, grainy mousse.
- Combine chocolate and cream:
- Fold about a third of your whipped cream into the chocolate first to lighten it, then gently fold that mixture back into the remaining cream. The key is being patient and not deflating all those air bubbles you just worked to create.
- Fill your chocolate cups:
- Either pipe the mousse in with a star tip for that professional look or just spoon it in generously. Stop about two thirds up to leave room for toppings.
- Add your toppings:
- This is where you can make each cup unique, piling on berries, nuts, marshmallows and chocolate curls however looks beautiful to you.
- Final chill:
- Another 20 minutes in the fridge lets everything set together nicely. They're easier to serve when they've had this final rest.
 Save Pin
 There was this moment at my sister's wedding shower when I brought these out, arranged on a beautiful slate board. The room went quiet for a second before everyone started taking photos. It wasn't just that they looked stunning, it was that each person could customize their own, making it feel personal. My grandmother, who's suspicious of anything too modern, took one bite and immediately asked if she could take some home.
Making Ahead
The chocolate cups can be made up to three days in advance and stored between layers of parchment paper in an airtight container. The mousse holds beautifully for 24 hours in the fridge, but I wouldn't fill the cups more than 4 hours before serving or they start to soften. Fresh toppings should absolutely be added at the last minute for the best texture contrast.
Flavor Variations
White chocolate cups with a dark chocolate mousse create this stunning marbled effect that always wows people. I've also made these with orange zest infused into the cream, which cuts through the richness in the most elegant way. For something completely different, try raspberry mousse folded through the chocolate for a pretty pink version.
Presentation Ideas
Arrange these on a large wooden board with small bowls of extra toppings so guests can customize. Label each topping with a cute tent card if you're feeling fancy, or just let people discover what's in each pile.
- Set up a grazing station with crackers and cheese nearby for a sweet and savory dessert course
- Add some fresh mint leaves around the platter for a pop of green that makes the chocolate really stand out
- Consider individual gold rimmed plates if you're serving these at a seated dinner
 Save Pin
 These chocolate grazing cups have become my go to for moments when I want to impress without spending all day in the kitchen. There's something magical about how something so simple can make people feel so special and indulged.
Recipe FAQs
- → How long do chocolate grazing cups stay fresh?
-
These grazing cups are best served within 24 hours for optimal texture. The chocolate cups may become soft if refrigerated longer than 2 days. Store in an airtight container in the refrigerator.
- → Can I make the chocolate cups in advance?
-
Yes, prepare the chocolate cups up to 2 days ahead. Store them carefully between layers of parchment paper in an airtight container at room temperature. Fill with mousse shortly before serving.
- → What's the best way to melt chocolate for the cups?
-
Use a double boiler for gentle, even heating or microwave in 30-second intervals stirring between each burst. Avoid overheating as chocolate can seize and become grainy. Let it cool slightly before coating the liners.
- → Can I substitute the heavy cream in the mousse?
-
Coconut cream works for a dairy-free version, though texture will be slightly different. The mousse won't be as stable with lower-fat alternatives, so full-fat cream is recommended for best results.
- → How do I prevent chocolate cups from cracking?
-
Ensure the chocolate coating is thick enough—at least 2-3mm. Let chocolate set completely at room temperature before refrigerating. Handle gently when removing liners, supporting the cup from the bottom.
- → What other toppings work well with these cups?
-
Try crushed cookies, caramel drizzle, toasted coconut, fresh mint leaves, citrus zest, or seasonal fruits. Edible flowers add an elegant touch for special occasions.
