 Save Pin
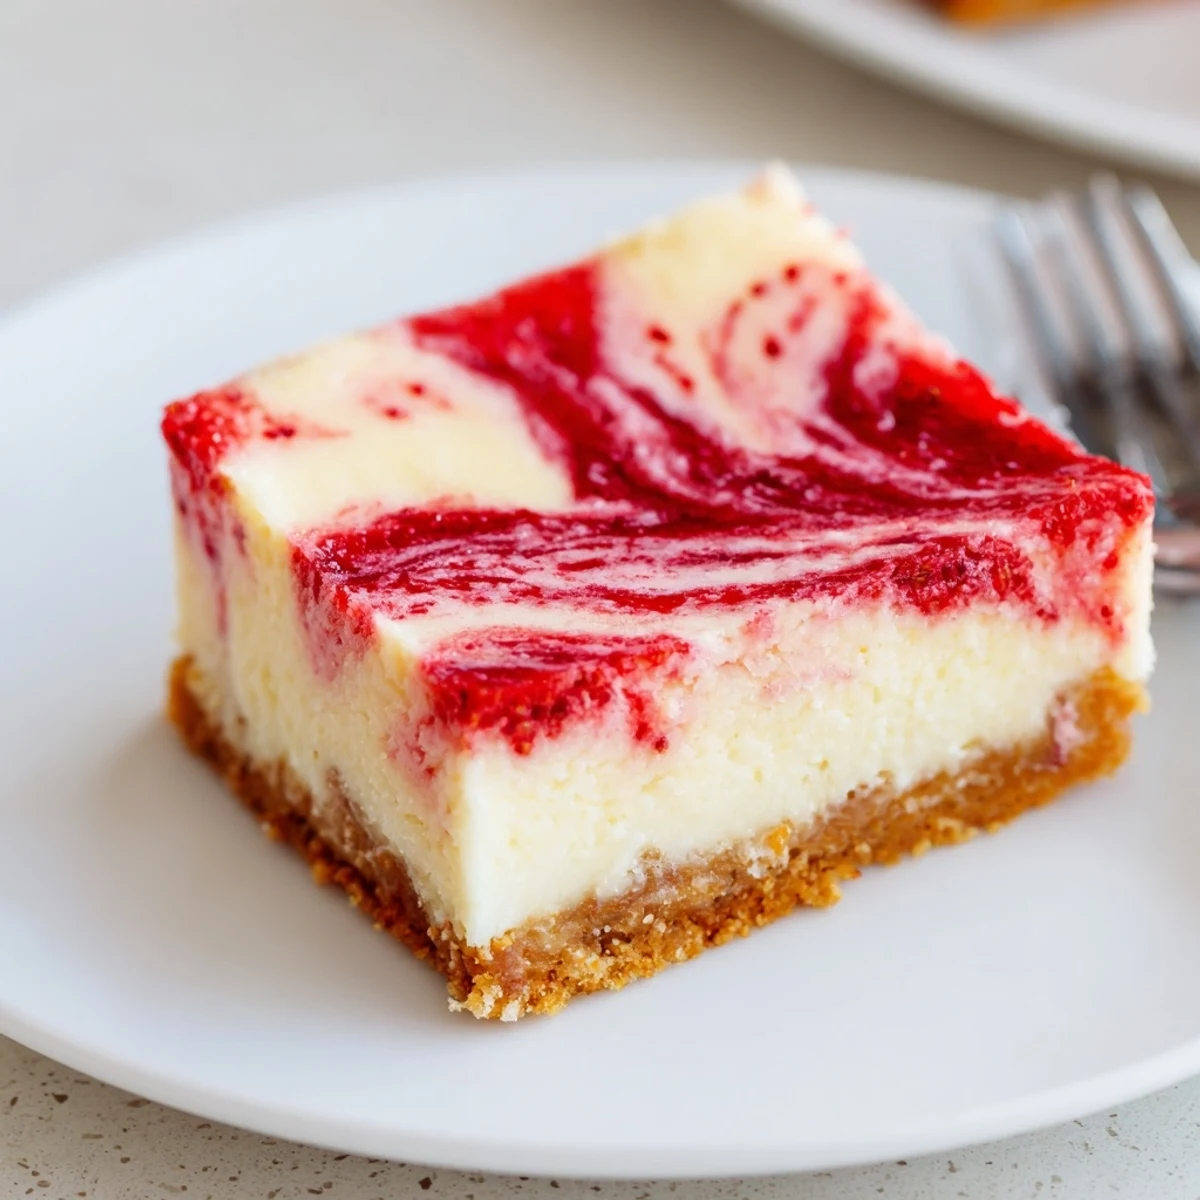
 These creamy, velvety cheesecake bars start with a buttery graham crust pre-baked for a firmer base. The filling blends softened cream cheese with sugar, eggs, vanilla, sour cream and a touch of flour for stability. Cook strawberries with sugar and lemon, cool and drop spoonfuls on the batter, then swirl gently. Bake at 325°F until the center is just set, then chill at least 2 hours. Yields 16 bars; store refrigerated up to 5 days or freeze slices wrapped well.
The smell of butter toasted graham crackers wafting through my kitchen on a rainy April afternoon convinced me that cheesecake bars, not the full towering kind, were the superior dessert all along.
My neighbor Sara once stood in my driveway eating two of these straight from the container I had just handed her, completely abandoning her grocery bags on the ground beside her.
Ingredients
- Graham cracker crumbs (1 1/2 cups, 150 g): The foundation of everything, so use fresh crumbs, not the stale box sitting in your pantry since last summer.
- Granulated sugar for crust (1/4 cup, 50 g): Just enough sweetness to make the crust feel like a cookie rather than a sandcastle.
- Unsalted butter, melted (1/2 cup, 115 g): This binds the crust together and toasting it lightly before melting adds a nutty depth most people skip.
- Fresh strawberries, hulled and chopped (1 cup, 150 g): Peak season berries make a sauce so fragrant you will want to eat it with a spoon before it ever touches the cheesecake.
- Granulated sugar for swirl (2 tbsp, 25 g): A modest amount that lets the natural tartness of the berries shine through.
- Lemon juice (2 tsp): This brightens the strawberry puree and prevents it from tasting flat or cloying.
- Cream cheese, softened (16 oz, 450 g): The star of the filling, and it must be truly soft or you will chase lumps around your bowl for twenty frustrating minutes.
- Granulated sugar for filling (3/4 cup, 150 g): Sweetens the cream cheese without tipping the whole dessert into candy territory.
- Large eggs, room temperature (2): Cold eggs cause the batter to seize and look curdled, so pull them out of the fridge an hour ahead.
- Vanilla extract (1 tsp): Use the real stuff here because it carries the entire flavor backbone of the filling.
- Sour cream (1/4 cup, 60 ml): Adds a subtle tang that keeps the richness in check and makes the texture silkier.
- All-purpose flour (2 tbsp, 15 g): A tiny amount that stabilizes the filling so it sets without cracking on top.
Instructions
- Preheat and prepare the pan:
- Set your oven to 325 degrees F and line a 9 by 9 inch pan with parchment paper, leaving generous overhang on two sides so you can lift the whole slab out later like a genius.
- Build the crust:
- Toss the graham crumbs, sugar, and melted butter together until everything looks like damp sand, then press it firmly and evenly into the pan using the bottom of a measuring cup. Bake for 8 minutes until it smells like warm honey and set it aside to cool.
- Simmer the strawberry swirl:
- Pile the chopped strawberries, sugar, and lemon juice into a small saucepan over medium heat, stirring and mashing with a spoon until the berries collapse into a glossy, syrupy reduction, about 5 to 7 minutes. Blend until smooth with an immersion blender and let it cool while you make the filling.
- Beat the cheesecake filling:
- In a large bowl, beat the softened cream cheese until completely smooth and lump free, then add the sugar and beat again until combined. Drop in the eggs one at a time, mixing well after each, then fold in the vanilla, sour cream, and flour just until the batter looks unified and creamy.
- Swirl and bake:
- Pour the cheesecake batter over the cooled crust and smooth the top with a spatula, then drop small spoonfuls of strawberry puree across the surface. Drag a knife or skewer through the dots in figure eight motions to create ribbons of red marble, then bake for 30 to 35 minutes until the center is just set with a gentle wobble.
- Cool and chill:
- Let the pan cool completely at room temperature, then refrigerate for at least 2 hours so the filling firms up properly. Lift the whole slab out using the parchment overhang and cut into 16 squares with a sharp knife wiped clean between each slice.
 Save Pin
 I brought a plate of these to a friend recovering from surgery and she told me they healed her faster than any prescription.
Storing and Making Ahead
These bars keep beautifully in the refrigerator for up to five days when tightly covered, and the crust actually firms up and improves on day two.
Fun Variations to Try
Swap the strawberry sauce for raspberry or blueberry depending on what looks best at the market, or layer all three for a tricolor showstopper.
Serving and Final Touches
A dollop of fresh whipped cream on each bar turns a casual treat into something worthy of a birthday celebration.
- Dust the tops with freeze dried strawberry powder for a concentrated burst of berry flavor.
- Warm your knife under hot water before cutting for perfectly clean edges every time.
- Always taste the strawberry sauce before swirling since berry sweetness varies wildly by season.
 Save Pin
 Every time I make these bars I wonder why I ever bother with full cheesecakes, and then I remember this recipe is the answer to that question.
Recipe FAQs
- → How do I tell when the bars are done?
-
The edges should be set and slightly puffed while the center remains a bit jiggly. A gentle shake will show minimal wobble; residual heat finishes the set as they cool.
- → Any tips for a clean, defined swirl?
-
Drop spoonfuls of cooled strawberry puree across the batter, then use a thin skewer or knife to draw S-shaped motions. Work quickly but gently to avoid over-mixing.
- → Can I use frozen strawberries for the swirl?
-
Yes—thaw and drain excess liquid, then cook down with sugar and lemon to concentrate flavor. If very watery, reduce a bit longer to reach a syrupy consistency.
- → How can I make a gluten-free version?
-
Substitute gluten-free graham-style crumbs for the crust and use a gluten-free all-purpose flour in the filling. Press and prebake the crust as usual for structure.
- → What’s the best way to get clean slices?
-
Chill the bars thoroughly for at least 2 hours. Use a sharp knife wiped clean between cuts; warming the blade under hot water and drying it gives the cleanest edges.
- → Can these be made ahead and frozen?
-
Yes—cool and chill fully, then cut and wrap individual bars tightly in plastic and foil before freezing. Thaw in the refrigerator before serving; texture holds well.
