 Save Pin
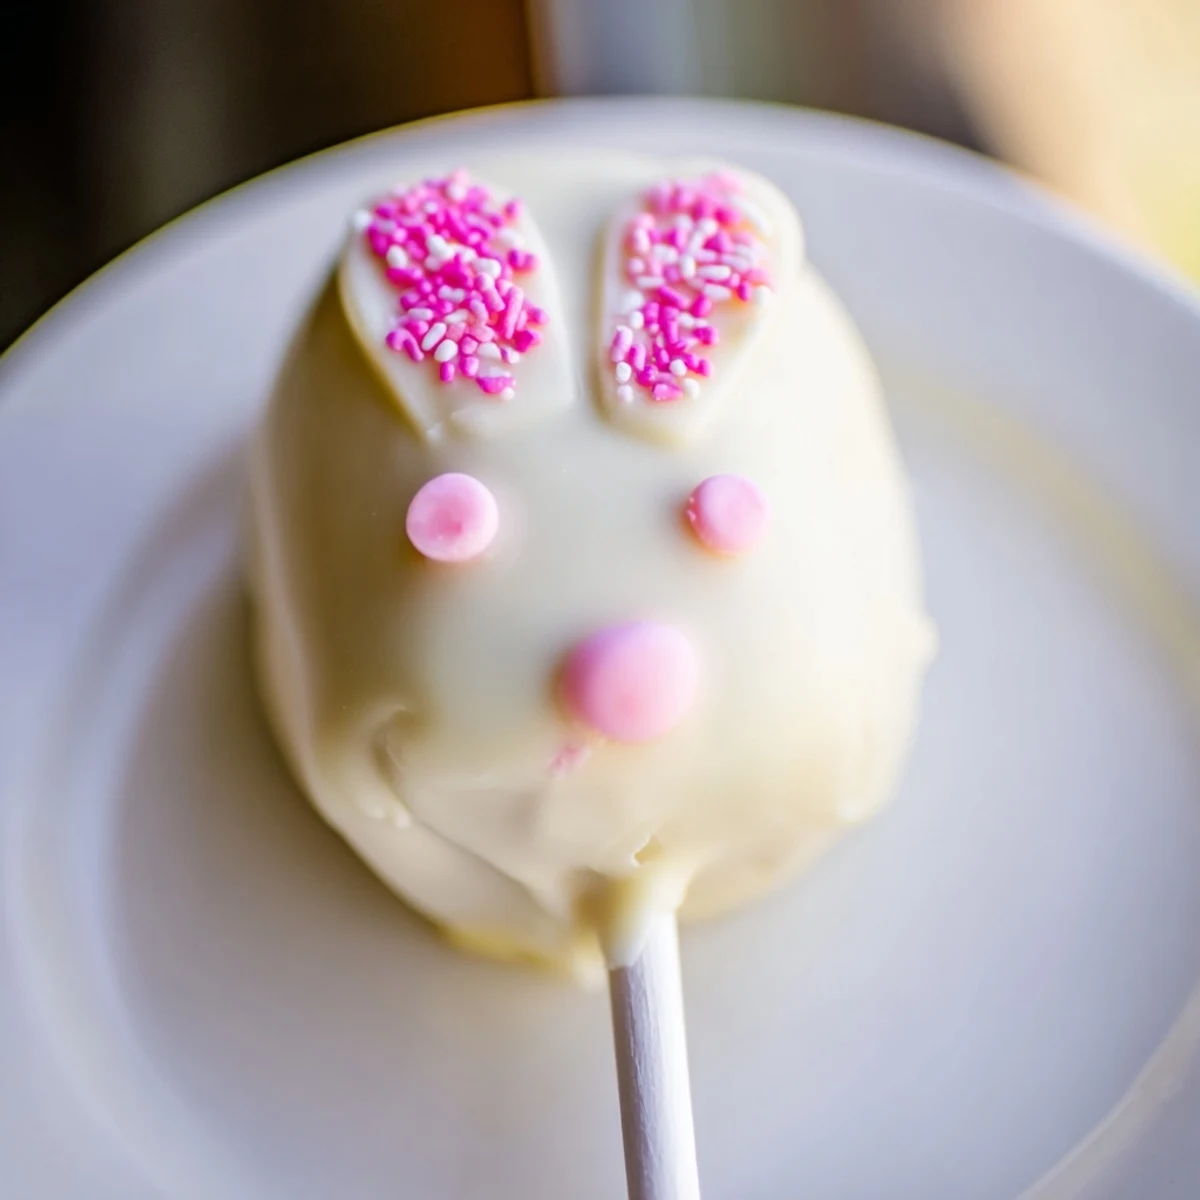
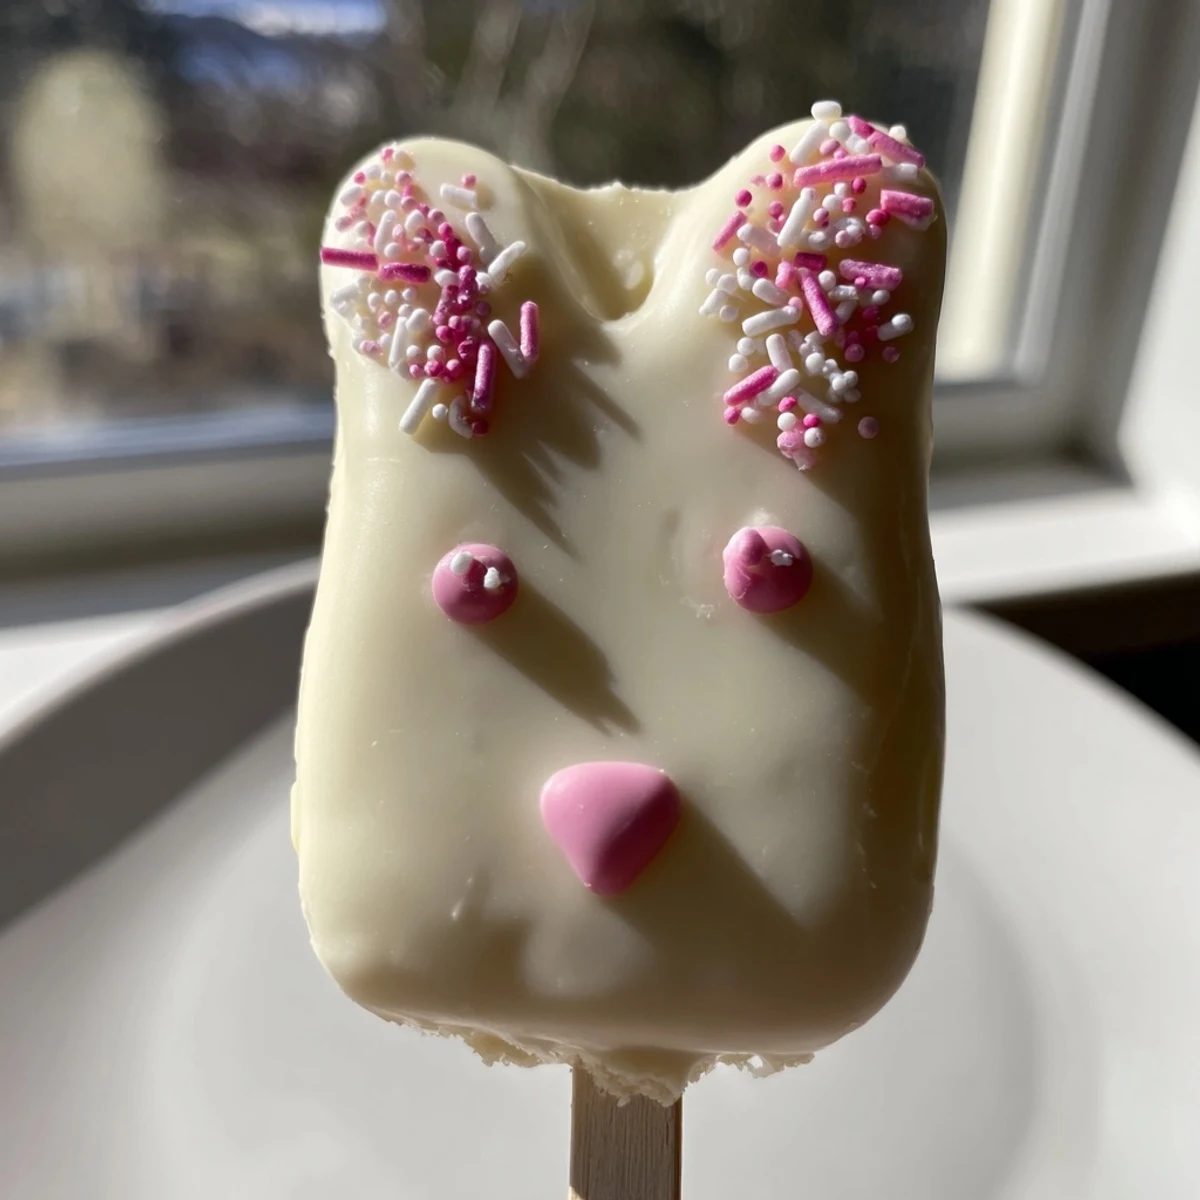
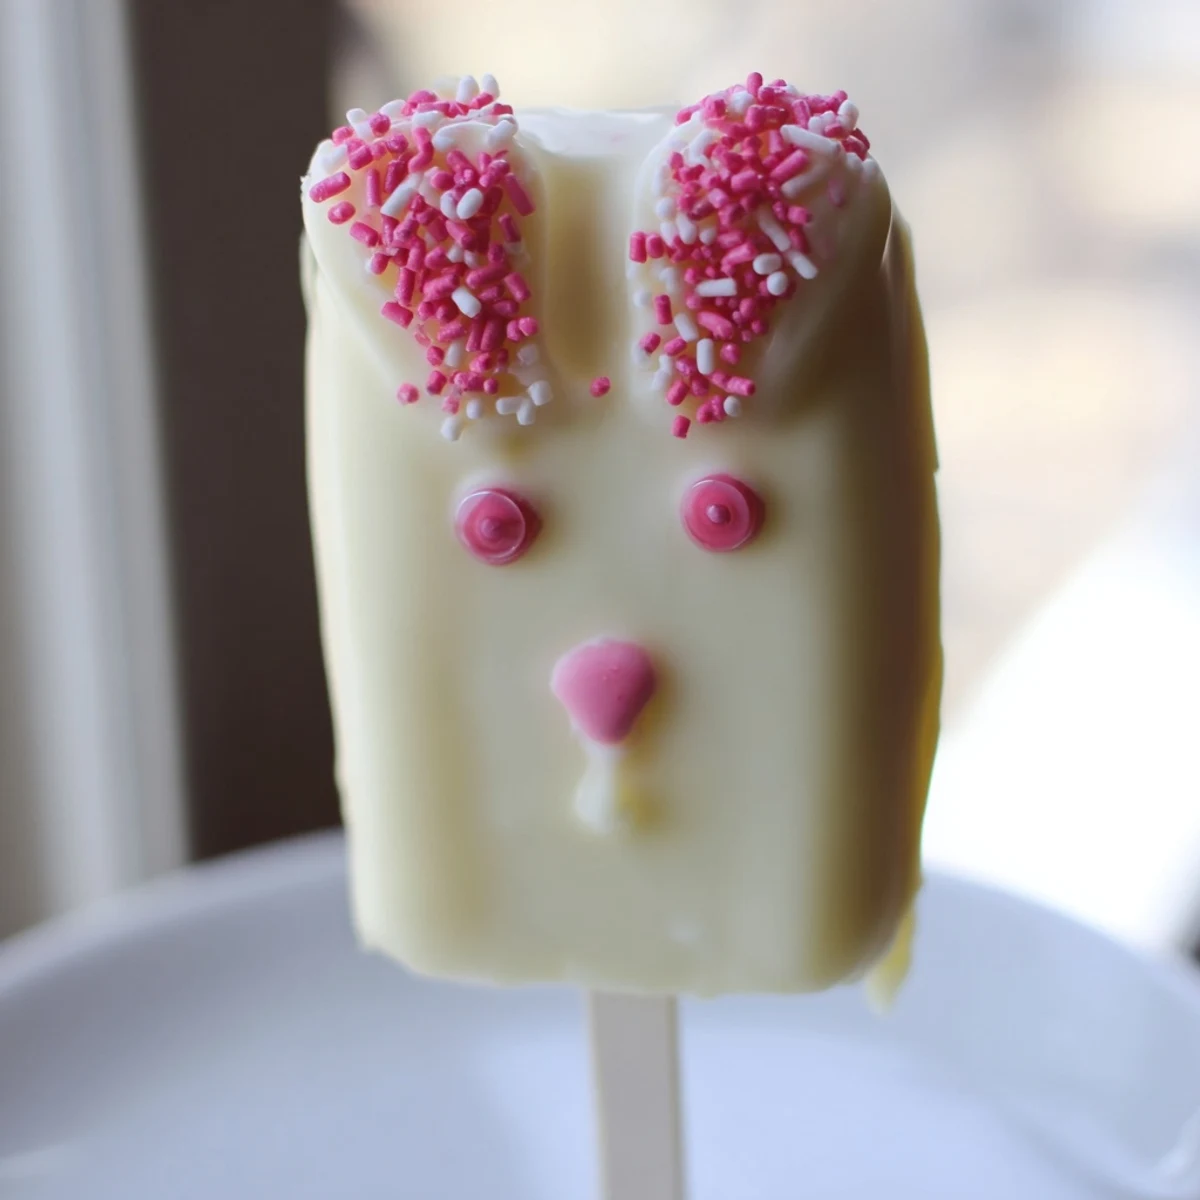
 These delightful white chocolate bunny cakesicles bring whimsical charm to your Easter dessert table. The combination of moist vanilla cake crumbs blended with cream cheese creates a perfectly fudgy interior, while the smooth white chocolate coating provides a sweet finish. Each bunny face comes to life with simple decorations like candy eyes, pink noses, and fondant ears, making them irresistible to both children and adults.
The process is straightforward and fun—mix cake crumbs with a creamy binder, shape into bunny faces, insert sticks, chill, then dip in melted white chocolate. The result is eight handheld treats that look impressive but require minimal baking expertise.
My daughter discovered these bunny cakesicles at a school spring festival and came home absolutely determined we had to make them for Easter brunch. She spent the entire car ride describing every detail of the pink ears and whiskers, and honestly her enthusiasm was completely contagious. That weekend we turned the kitchen into what looked like a sprinkles explosion, and the mess was absolutely worth every second of seeing her face light up when the first bunny face came together.
Last year I made these for our neighborhood egg hunt and they disappeared faster than any of the traditional cookies or brownies. One mom asked for the recipe before she even finished her first bite, and her daughter was already planning her birthday party around different animal shapes. Something about eating dessert on a stick makes everything feel more festive and fun.
Ingredients
- Vanilla cake crumbs: Using homemade or store bought cake works perfectly, just ensure the crumbs are fine enough to mold easily into shapes
- Cream cheese: This binds everything together while adding a subtle tang that cuts through the sweetness of the white chocolate
- Unsalted butter: Room temperature butter helps the mixture hold its shape without making the dough too soft or greasy
- Powdered sugar: Just enough to sweeten the cake mixture without overpowering the delicate vanilla flavor
- Vanilla extract: Pure vanilla adds depth and warmth that artificial vanilla simply cannot replicate
- White chocolate: High quality white chocolate or candy melts create a smooth professional looking coating that sets beautifully
- Edible gel food coloring: A tiny bit goes a long way for creating pink noses and ears without thinning the chocolate
- Cakesicle sticks: These sturdy sticks hold the weight of the cake and chocolate without bending or breaking
- Decorations: Candy eyes sprinkles and fondant let everyone customize their own unique bunny personality
Instructions
- Mix the cake dough:
- Combine cake crumbs cream cheese butter powdered sugar and vanilla in a medium bowl mixing until the mixture holds together when pressed. The texture should resemble play dough that molds easily but does not feel sticky or wet.
- Shape bunny faces:
- Divide the dough into 8 equal portions and form each into a flattened oval with slightly pointed top edges for ears. Work quickly with clean hands to prevent the mixture from becoming too warm and difficult to shape.
- Add sticks and chill:
- Insert a cakesicle stick into the bottom of each shape pressing about halfway in and smoothing the dough around the opening. Refrigerate for at least 20 minutes until firm because cold cake pops are much easier to coat without falling apart.
- Melt the coating:
- Heat white chocolate in a microwave safe bowl in 30 second intervals stirring thoroughly between each burst. Stop when the chocolate is completely smooth and流动 like heavy cream.
- Coat the cakesicles:
- Dip each chilled cake pop into the melted chocolate tilting the bowl to coat completely then gently tap against the side to remove excess. Work quickly before the chocolate begins to set.
- Add decorations immediately:
- While the coating is still soft place candy eyes sprinkle noses and fondant ears onto each bunny face. The decorations adhere best when added right after dipping so have everything ready before you start coating.
- Set completely:
- Let the cakesicles stand at room temperature until the chocolate is firm to the touch which usually takes about 15 to 20 minutes. For faster setting you can refrigerate the tray for 5 to 10 minutes.
- Finish with details:
- Use food coloring pens or gel to add whiskers tiny mouths or additional details once the base coating has completely hardened.
 Save Pin
 These bunny cakesicles have become such a beloved Easter tradition that my kids now request them for every spring celebration from school parties to family brunches. There is something magical about watching little hands carefully place each candy eye and decide exactly where the pink nose should go.
Getting The Best Cake Crumb Texture
I have learned that slightly stale cake actually works better than fresh because it creates finer more consistent crumbs that bind together beautifully. If you are using freshly baked cake let it cool completely then break it into small pieces and let it sit uncovered for a few hours before processing into crumbs.
Customizing Your Bunny Designs
The beauty of these cakesicles is how easily they adapt to different decorating styles and skill levels. Younger children can simply add sprinkles and candy eyes while older kids and adults might create fondant bows flowers or even tiny carrot decorations using colored candy melts.
Making These Ahead For Easter Morning
You can prepare the cake mixture and shape the bunny faces up to two days in advance storing them tightly wrapped in the refrigerator. The morning of your celebration simply melt the chocolate dip and decorate for a stress free dessert that looks like you spent hours crafting.
- Set up a decorating station with small bowls of different toppings so everyone can customize their own bunny
- Keep a small offset spatula or toothpick handy for repositioning decorations before the chocolate sets
- If you are transporting these cakesicles insert each stick into a small piece of foam or styrofoam to keep them upright and smudge free
 Save Pin
 Watching friends and family light up when they spot these adorable bunny treats has become one of my favorite parts of hosting Easter. Hope these bring as much joy to your celebration as they have to ours.
Recipe FAQs
- → How long do these bunny cakesicles stay fresh?
-
Store your cakesicles in an airtight container in the refrigerator for up to 3 days. The white chocolate coating helps keep the cake interior moist and fresh. For best results, let them come to room temperature for about 10 minutes before serving.
- → Can I make these without a cakesicle mold?
-
Absolutely! While molds create uniform shapes, you can hand-form the cake mixture into flattened oval bunny faces. The dough-like consistency holds together well, making it easy to shape freeform. Just ensure they're evenly thick for consistent coating.
- → What type of cake works best for the crumb mixture?
-
Vanilla cake provides a neutral base that pairs beautifully with white chocolate. However, you can use chocolate cake, lemon, strawberry, or even red velvet for different flavor variations. Store-bought cupcakes or trimmed cake edges work perfectly—no need to bake from scratch.
- → How do I prevent the white chocolate from seizing when melting?
-
Melt white chocolate in short 30-second bursts, stirring thoroughly between each interval. Avoid getting any water into the chocolate—even a drop can cause seizing. If the chocolate becomes too thick, add a teaspoon of coconut oil or vegetable shortening to smooth it out.
- → Can I freeze these bunny cakesicles for later?
-
Yes! Freeze undecorated cakesicles (after dipping and before adding facial features) for up to 1 month. Thaw overnight in the refrigerator, then bring to room temperature before adding decorations. This makes them excellent for make-ahead Easter preparation.
- → What other decorating options work well for bunny faces?
-
Beyond candy eyes, try using mini chocolate chips, edible pearls, or piped white chocolate dots for eyes. Pink sprinkles make adorable noses, while sliced almonds or shaped fondant create ears. You can also use edible food markers to draw whiskers and smiles once the coating sets.
