 Save Pin
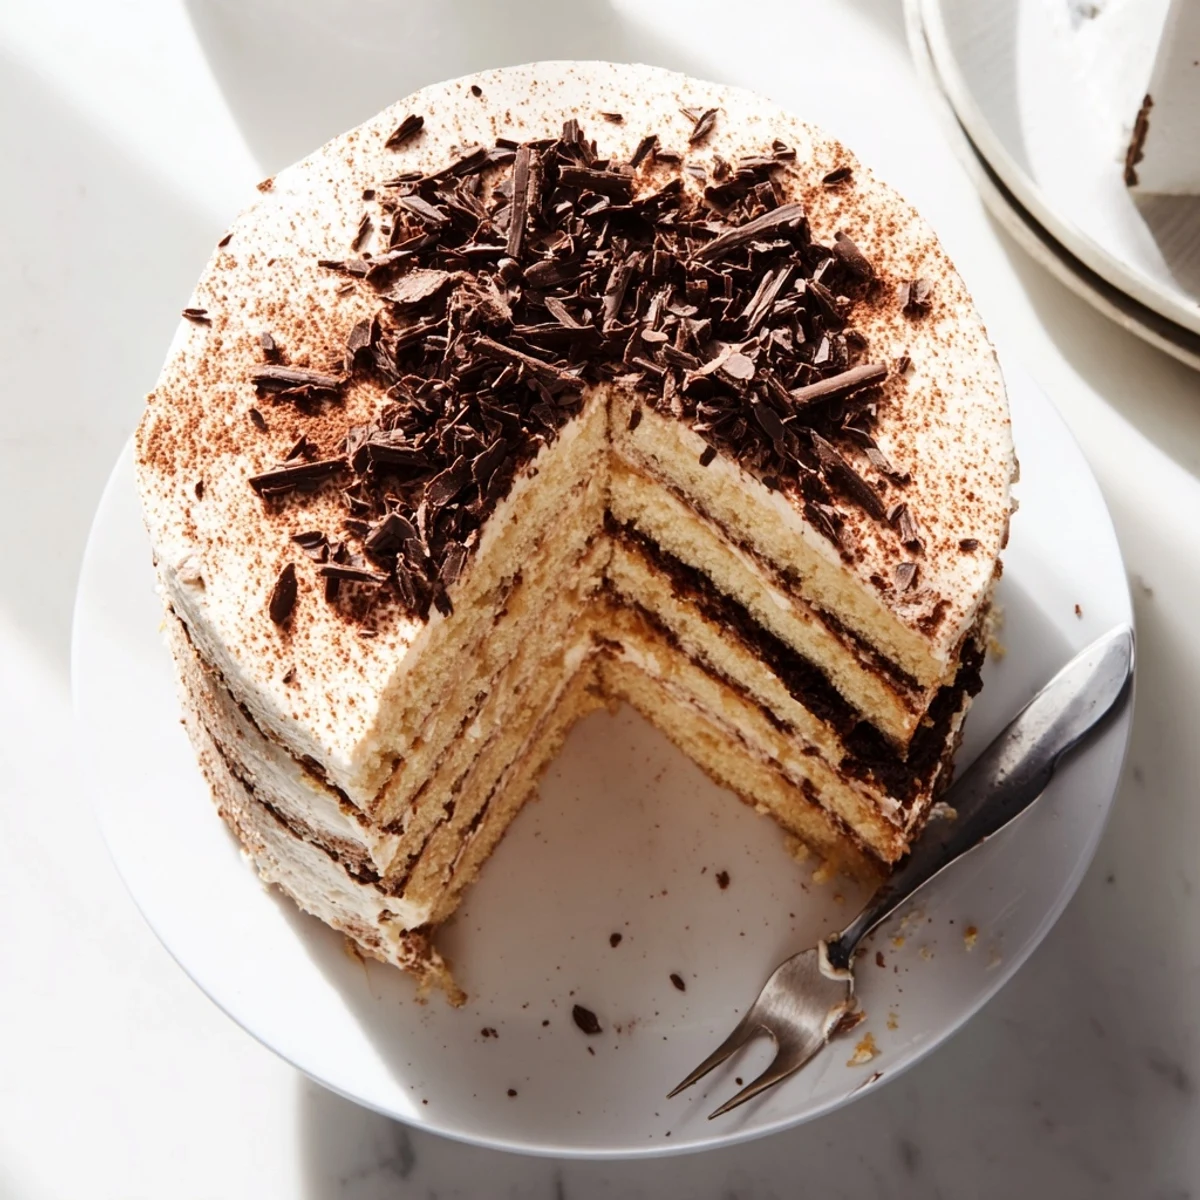
 This stunning Italian dessert features light vanilla sponge layers brushed with sweetened espresso syrup, then filled with a silky mascarpone cream whipped to perfection. The assembly creates beautiful alternating bands of golden cake and white cream, finished with a classic dusting of unsweetened cocoa powder. After chilling for at least four hours, the flavors meld together beautifully—the bitter coffee perfectly balancing the rich, sweet filling. Ideal for dinner parties or celebrations, this impressive dessert serves 10-12 people and tastes even better when made ahead, allowing the sponge to fully absorb the coffee syrup while the mascarpone sets into a luscious, sliceable consistency.
The first time I attempted tiramisu cake, I accidentally used salt instead of sugar in the coffee syrup. My husband took one bite and made a face that still makes me laugh whenever I pull out the espresso maker. That disaster taught me to label everything clearly, but it also made me obsessed with perfecting this recipe. Now it's the one dessert that disappears faster than anything else at dinner parties.
Last Christmas, my sister-in-law who claims to hate coffee dessert had three slices. She kept saying she just wanted to taste the cake part again and again, but the espresso stains on her napkin told the real story. Watching someone discover they actually love something they thought they hated is pure kitchen magic.
Ingredients
- 1 1/2 cups all-purpose flour: This forms your foundation. Sift it first even if it says pre-sifted on the bag; that extra aeration makes all the difference between tender and tough.
- 1 cup granulated sugar: I learned the hard way that beating this with eggs creates the cake's structure. Do not skip the fluffing step or your layers will be dense.
- 4 large eggs: Room temperature eggs trap more air when beaten. Leave them out for 30 minutes before you start mixing anything.
- 1/2 cup unsalted butter, softened: Softened means you can press your finger into it but it still holds its shape. Too soft makes a greasy cake; too cold creates pockets of uncreamed butter.
- 3/4 cup strong espresso, cooled: The coffee needs to be completely cold or it will melt your mascarpone filling. I brew it the night before and keep it in a sealed jar.
- 1 cup mascarpone cheese, room temperature: Cold mascarpone will curdle when folded into cream. Let it sit out for at least an hour. Trust me, I have ruined enough fillings to know this matters.
- 1 1/4 cups heavy cream, cold: Chill your mixing bowl and whisk in the freezer for 15 minutes. Whipped cream is unforgiving about heat.
Instructions
- Prep your pans and preheat:
- Grease those pans thoroughly, line the bottoms with parchment, and get your oven to 350°F (175°C). Wait to start mixing until you hear the oven ding its ready signal.
- Build your batter base:
- Beat eggs and sugar until the mixture falls from the whisk in a thick ribbon. This takes 3–4 minutes but creates the airy texture you want. Add butter and vanilla, then incorporate your dry ingredients alternating with milk.
- Bake to golden perfection:
- Divide batter evenly between pans and bake 22–25 minutes. The toothpick test works, but I also gently press the center; if it springs back, it is done.
- Make the coffee magic:
- Stir espresso, coffee liqueur if you are using it, and sugar until dissolved. Set this aside to cool completely while your cakes do the same.
- Whip up the clouds:
- Whip cold cream in a chilled bowl until stiff peaks form. In another bowl, beat mascarpone, powdered sugar, and vanilla until smooth, then fold the cream in gently.
- Layer by glorious layer:
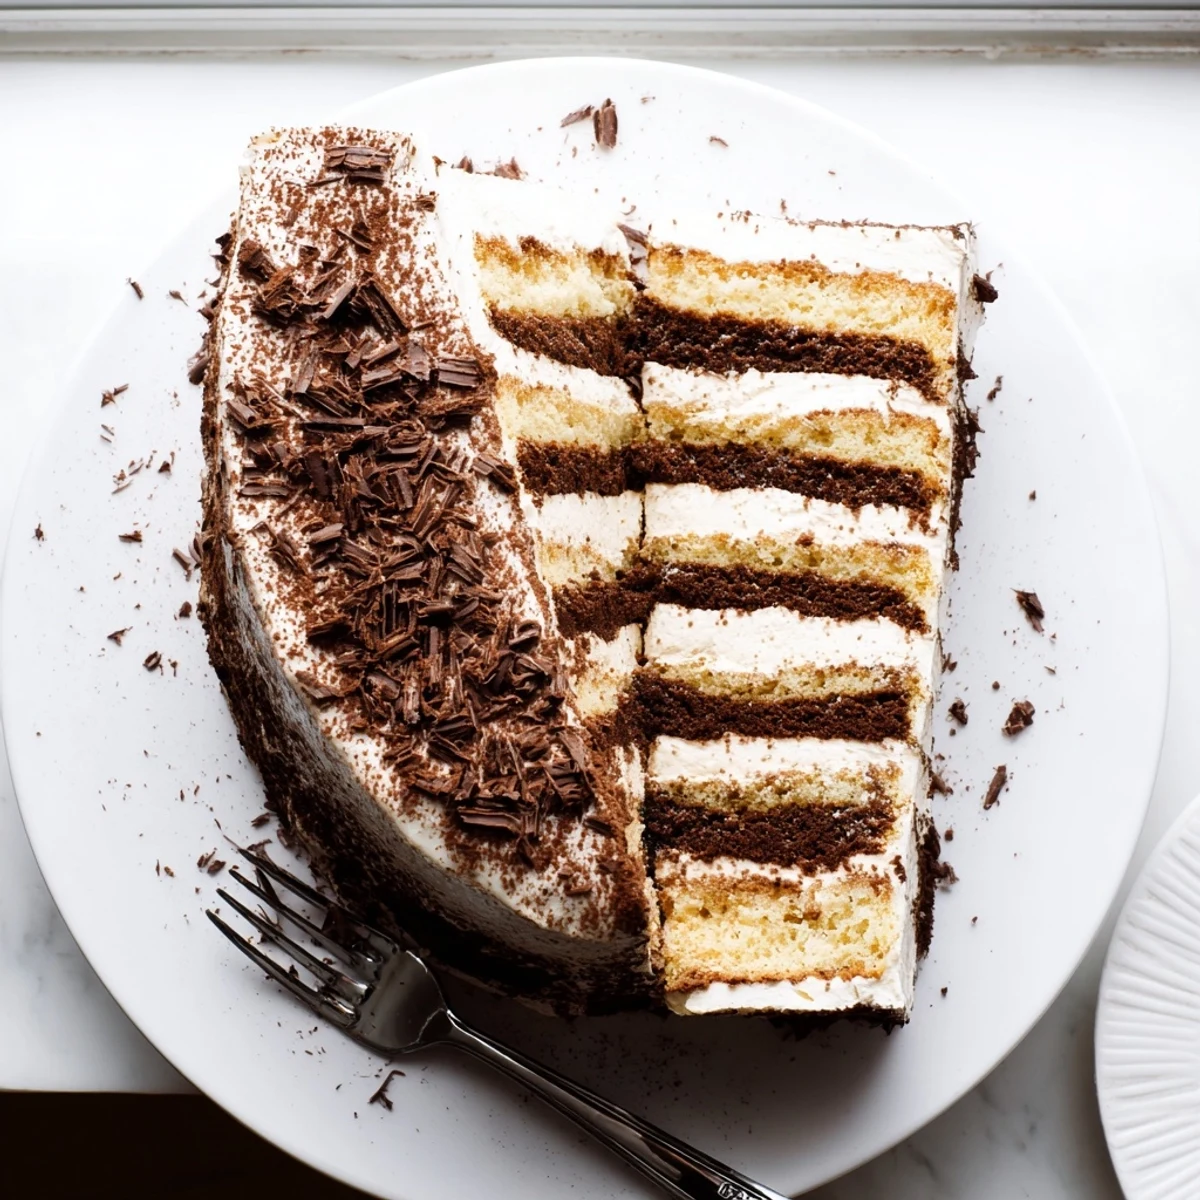
- Slice each cake horizontally for four layers total. Brush each layer generously with coffee syrup, spread a quarter of the filling, repeat until you end with mascarpone on top.
- The hardest part—waiting:
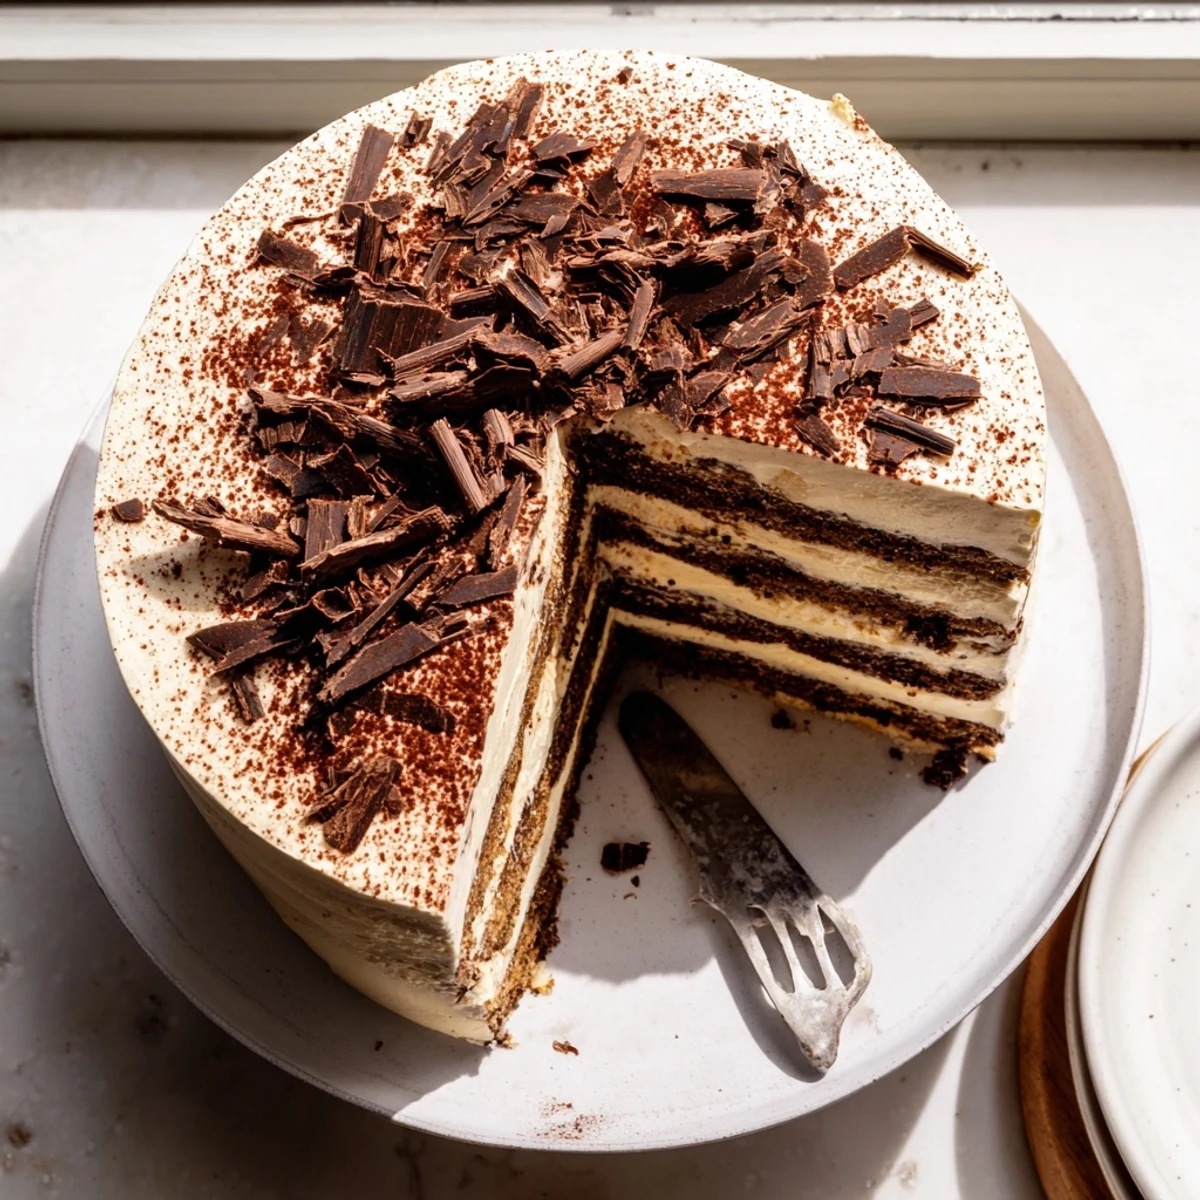
- Chill at least 4 hours or overnight. The flavors need time to marry and the structure needs to set. Dust with cocoa and add chocolate shavings right before serving.
 Save Pin
 My grandmother used to say patience is the secret ingredient in Italian desserts. She was right, but she also never had to wait four hours for tiramisu cake while her entire house smelled like espresso and vanilla. The hardest part is not sneaking a slice before it chills.
Making It Ahead
This cake actually improves after 24 hours in the refrigerator. The coffee syrup permeates deeper into the sponge, and the mascarpone filling firms up beautifully. I have made it two days ahead for parties, and it is always better than the fresh version.
Perfecting Your Layers
Use a long serrated knife and rotate the cake as you slice. Do not saw back and forth. A gentle rotating motion creates even layers that stack straight and tall. My first attempt looked like the Leaning Tower of Pisa.
Serving Suggestions
Let the cake sit at room temperature for 15–20 minutes before slicing. Cold mascarpone has a waxy texture; room temperature filling is creamy and luscious. Use a sharp knife dipped in hot water for clean slices.
- Use a fine mesh sieve for the cocoa dusting so it falls like snow.
- Chill your serving platter first; the cake is easier to transfer when cold.
- Leftovers keep for 3 days if tightly covered, though they rarely last that long.
 Save Pin
 There is something deeply satisfying about serving a dessert that looks complicated but comes together with such simple ingredients. Every slice feels like a small celebration.
Recipe FAQs
- → How long should I chill the assembled cake?
-
Refrigerate for at least 4 hours, though overnight chilling produces the best results. This allows the coffee syrup to fully penetrate the sponge layers while the mascarpone filling sets properly for clean slicing.
- → Can I make this without alcohol?
-
Absolutely. Simply omit the coffee liqueur from the syrup mixture. The espresso alone provides plenty of depth and flavor, making it suitable for all ages and preferences.
- → How do I store leftovers?
-
Cover tightly with plastic wrap or store in an airtight container in the refrigerator. The cake keeps well for 3-4 days, though the texture remains best within the first 48 hours of assembly.
- → Can I freeze this dessert?
-
Freezing isn't recommended as the mascarpone filling can become grainy and lose its silky texture when thawed. The cake is best enjoyed fresh within a few days of preparation.
- → What's the best way to slice neat layers?
-
Use a long serrated knife and rotate the cake as you cut, keeping the knife horizontal. Mark the halfway point around the circumference with toothpicks first for even guidance.
- → Can I use instant coffee instead of espresso?
-
Yes, dissolve 2 tablespoons of instant espresso powder in 3/4 cup of hot water, then cool completely. The flavor will be slightly less intense but still delicious.
